Scaling Images on Rotation

We recently released an “image scaling on rotation” feature for Uppy’s Image Editor, an often-requested feature that we’re super proud to be able to announce.
In this blog post, we’ll be taking a peek behind the curtain, as we take a detailed look into the development of this feature, and our thought-process approaching it.
Before we start though, take a look below at a comparison between how Uppy’s Image Editor used to handle image rotations, and how it handles them now.
| Rotation | |
|---|---|
| Without scaling | With scaling |
Without further ado, let’s dive into some of the finer technical details, so you can follow along and implement this feature into your own image editor.
The above UI is present in many image editors - for example, the default image editors on iOS and Android both employ it. Often users expect this behaviour too, leading to some confusion when their images are left with ugly corners after a rotation.
We implemented this in Uppy’s Image Editor last week, and the solution turned out to be non-trivial. Since this is a pretty ubiquitous task to solve for all image editors, we decided to release our solution to the world and write out a post about it, instead of keeping it hidden away as part of internal notes.
3 Steps
There are 3 steps to our scaling implementation:
- Ask your designer what scaling on rotation should look like
- Find the
.scale()function - Calculating the geometry
1. Trust your designer
When I first approached this task, my gut-instinct was to go for the “rotated rectangle inscribed within another rectangle” solution so that the largest-area inscription possible is achieved. This route turned out to be an unpleasant user experience, so take this as an important lesson in trusting your designer, and consulting them first on what the user might want.
Alternatively, you can choose to trust our designer’s advice by:
- always rotating the image around the center of the image (intersection of the diagonals)
- just enlarging the image to remove any empty corners
2. Find the .scale() function
To enlarge the image in a way that covers empty corners, we first need a scaling
function. Uppy uses cropperjs v1.x
as an image editing library, which exposes the cropper.scale(scalingFactor)
function. Most image editing libraries are likely to have a similar function,
but of course feel free to code one yourself if you feel up to the challenge.
Importantly, the scaling function should
uniformly enlarge
the image around its center, where the scalingFactor is determined by
desiredHeight/oldHeight.
3. Calculate the geometry
Now, we want to draw our before-rotation & after-rotation shapes on the same picture, and apply some trigonometry. If you need to brush up on the mathematics behind this, we recommend watching the following Khan Academy lessons on how angles work and how sines and cosines work, as these cover everything you’ll need to follow along.
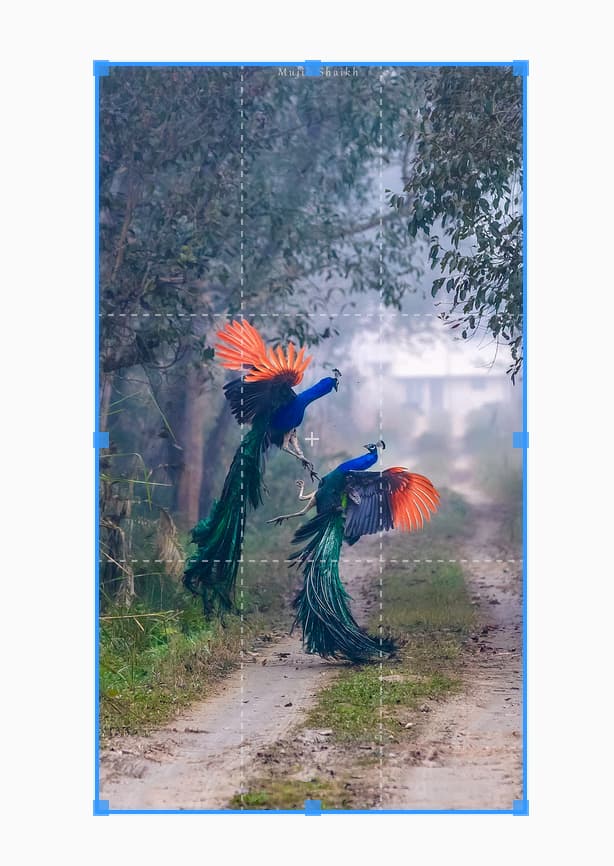
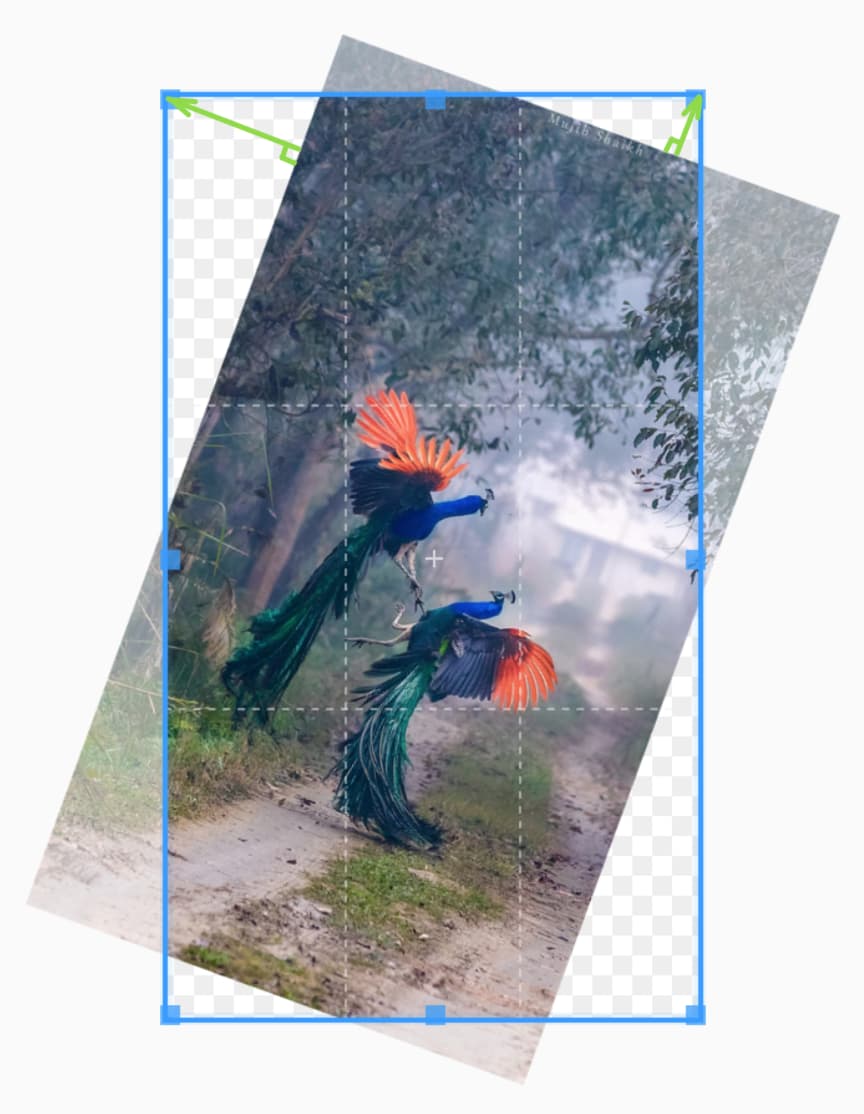
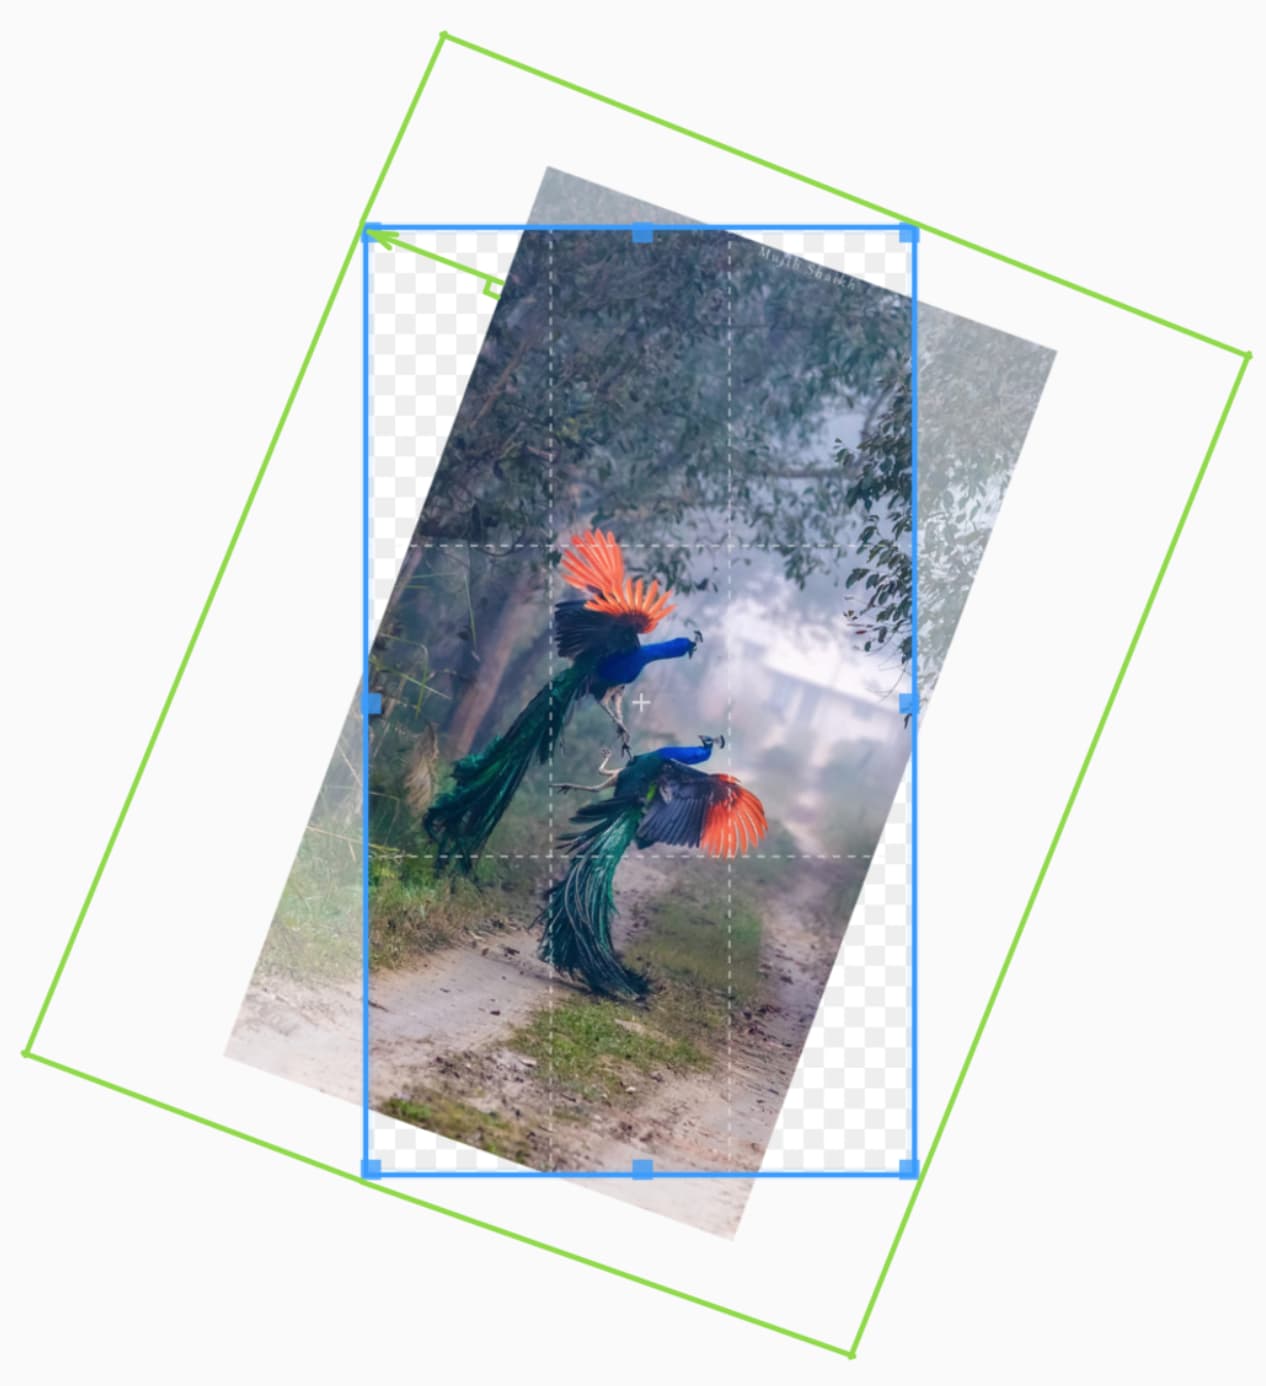
In the images below, we see what happens on rotation by default. To remove the
empty corners, the user would have to drag around the edges of the cropbox. What
we can do instead is scale the image (in the directions shown by the <span
style={{ color: rgb(127, 194, 65) }}>green arrows) so that these
corners disappear.
| What happens on rotation | |
|---|---|
|
|
So, to cover up these checkered corners, we will need to scale the image. If we
cover up the larger corner, the smaller corner will get covered up
automatically, so our code takes the form of
scale(Math.max(scalingFactor1, scalingFactor2)). These two scaling factors are
calculated very similarly, so we’ll only focus on calculating only one of them
in this tutorial (although the full solution is given in the conclusion).
In the images below, the <span style={{ color: rgb(127, 194, 65) }}>green
rectangle represents the desired dimensions of our image after it’s
scaled. Our scaling function (and hopefully yours) is defined in such a way that
if we have the image of height h, and we want to scale it up to height H, we
need to execute .scale(H/h). Since we already know h, as it’s the height of
our image, we only need to find H to complete our scaling function.
| We want to find H | |
|---|---|
|
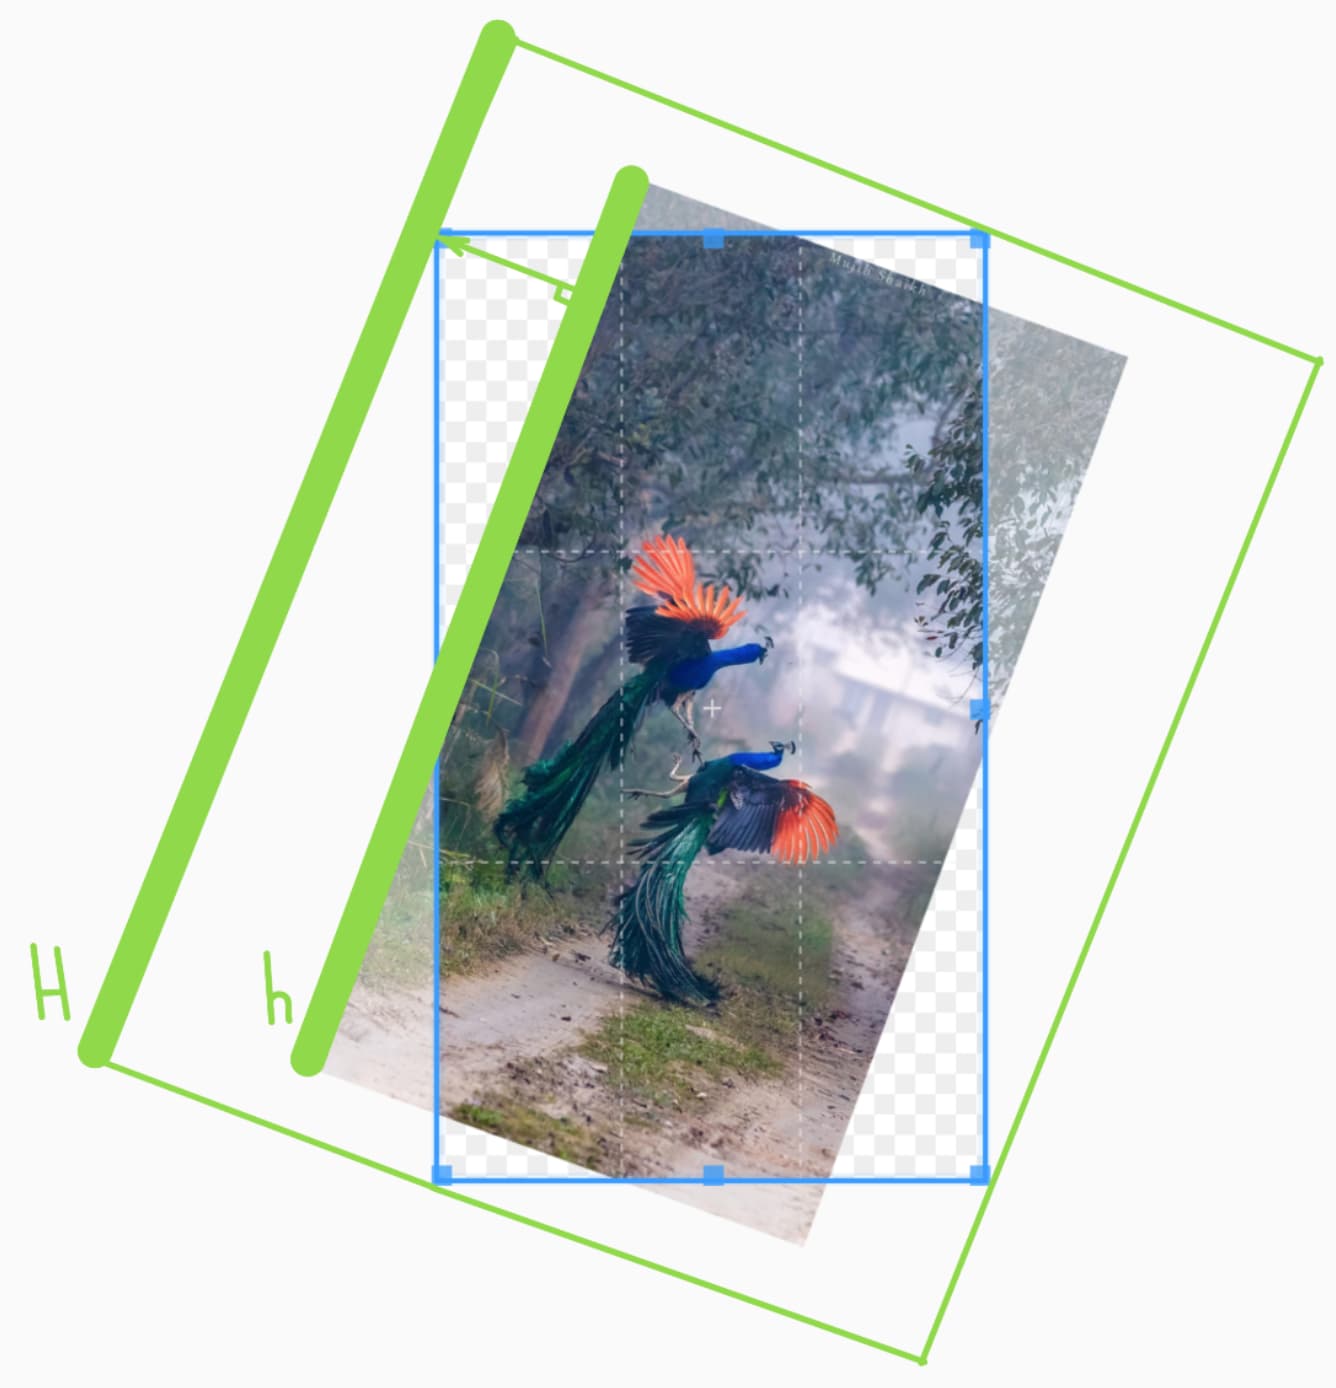
|
For the rest of the tutorial, the following steps are then automatic - as we
know all the angles in the image, we know the image’s width and height, and we
know to find H.
The easiest way to go about it, is to first annotate the image with all the
relevant angles. We’ll be using blue for the rotation angle
α, and pink
for 90 - α:
| Color all angles |
|---|
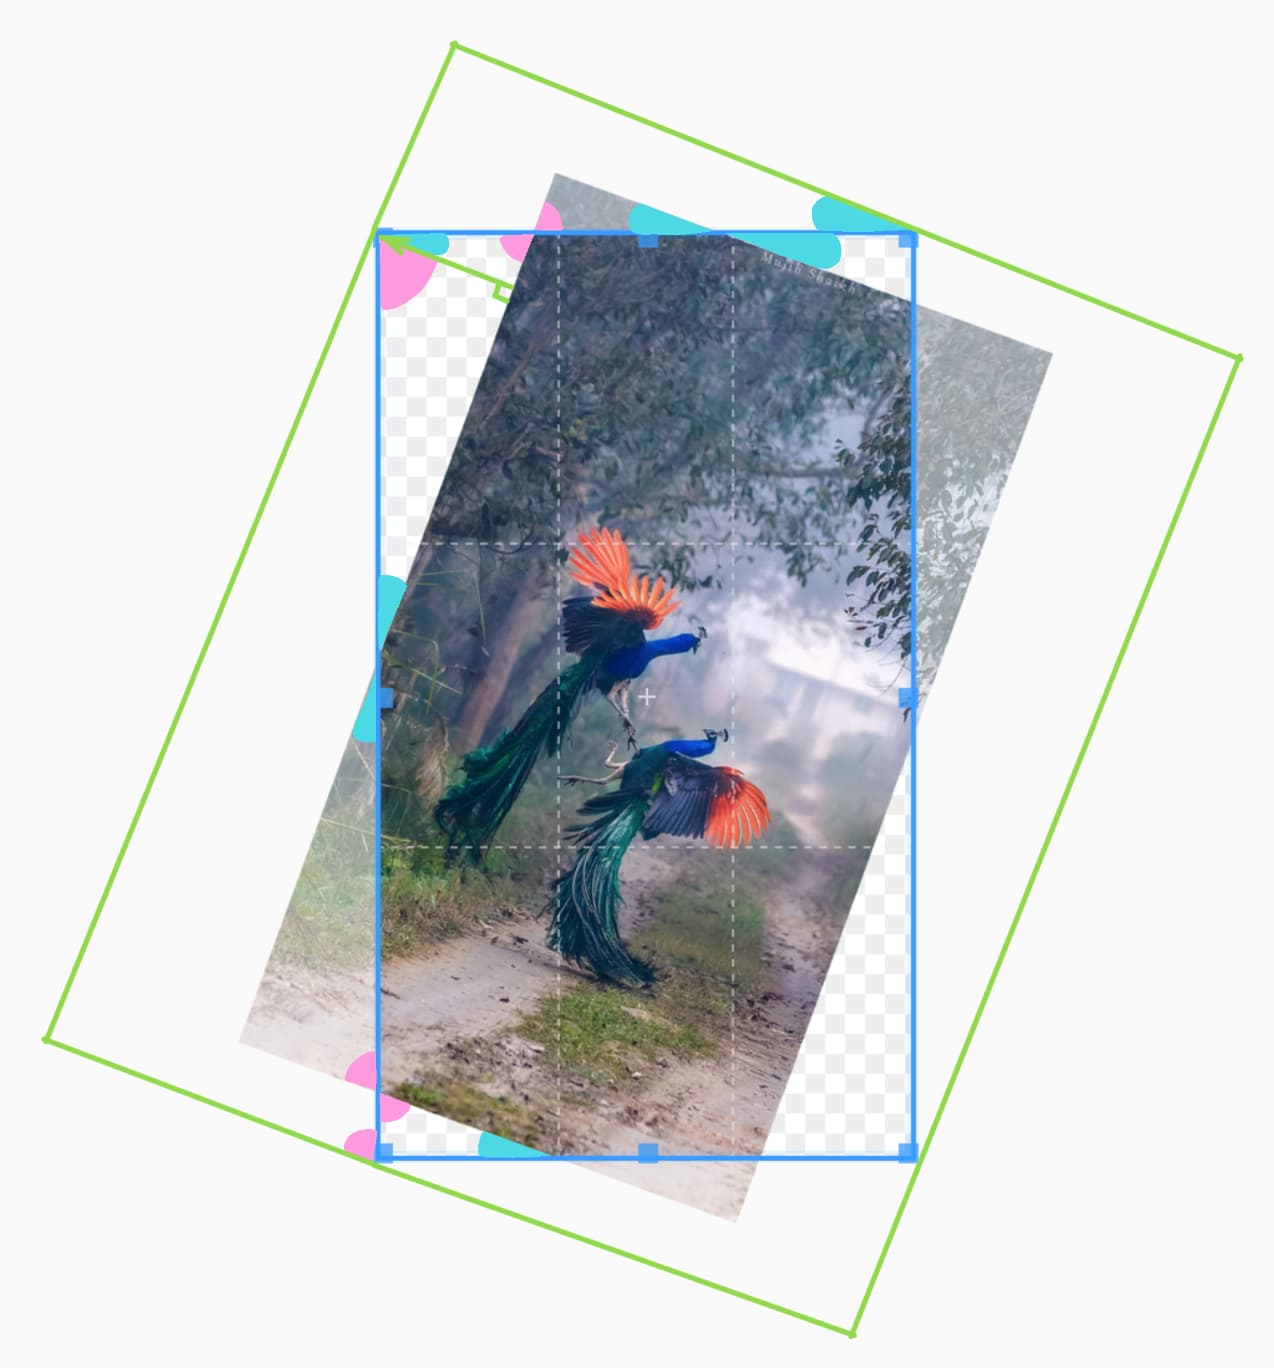
|
We can then find H, by adding the two outer sides of these triangles.
| Add two triangle sides: H = sin(α - 90) * h + sin(α) * w | |
|---|---|
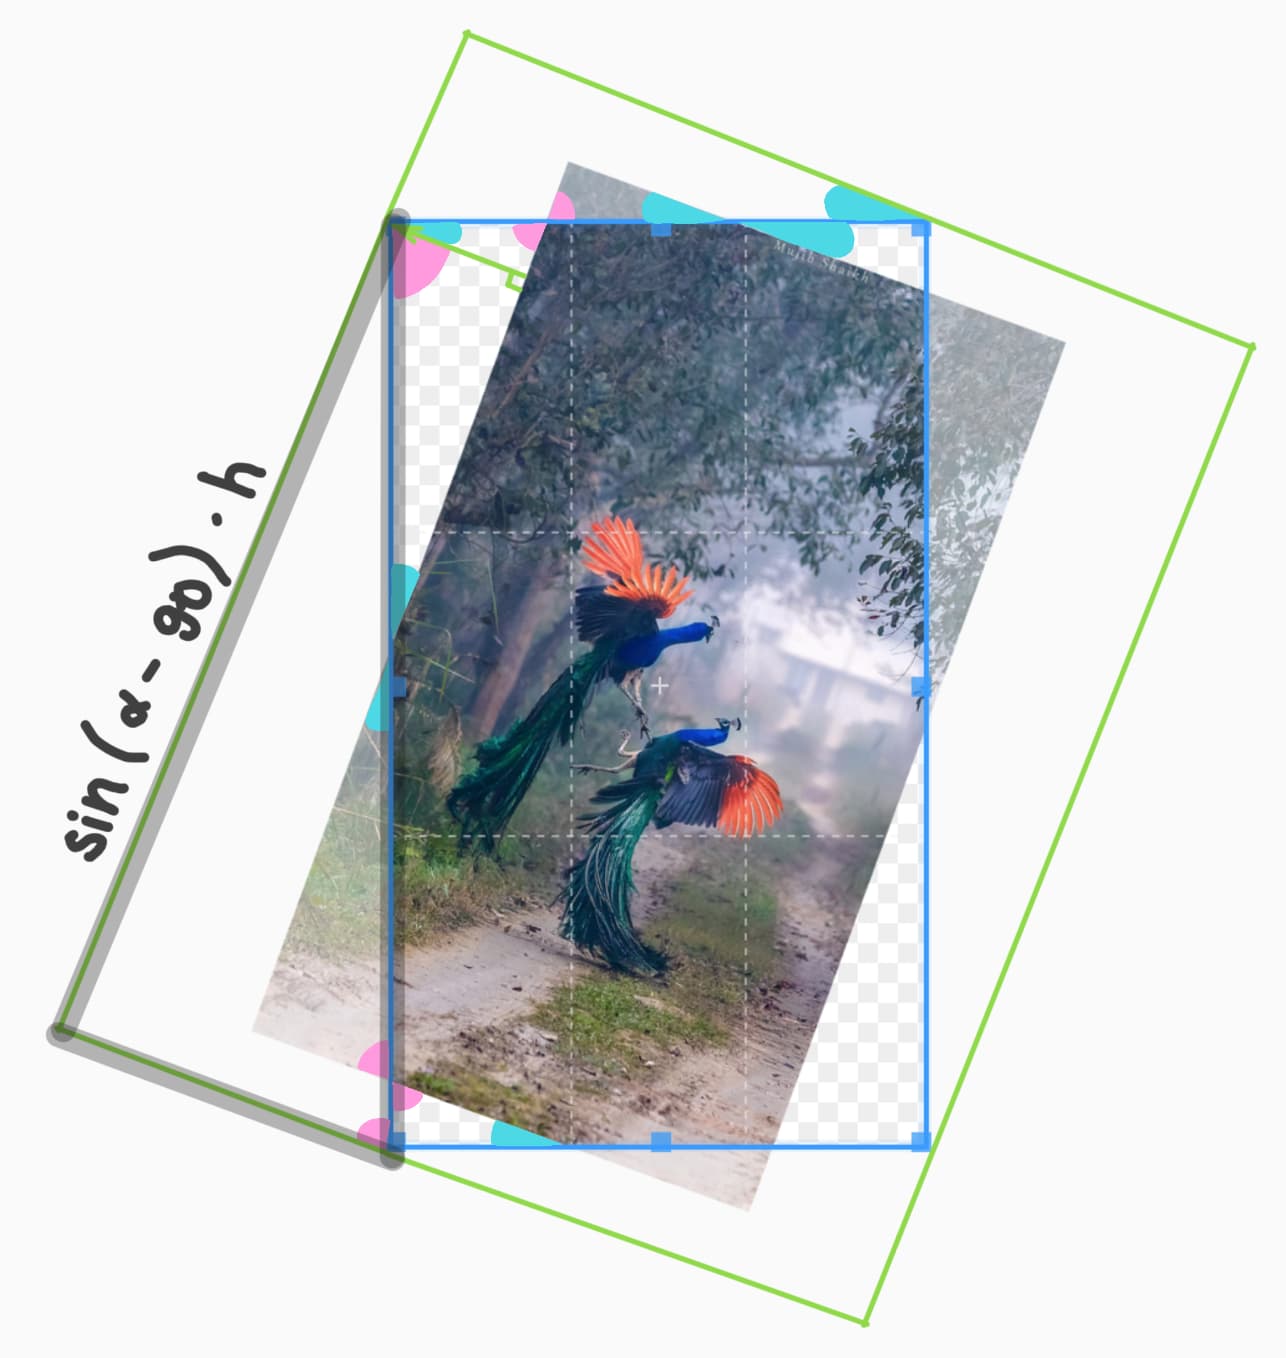
|
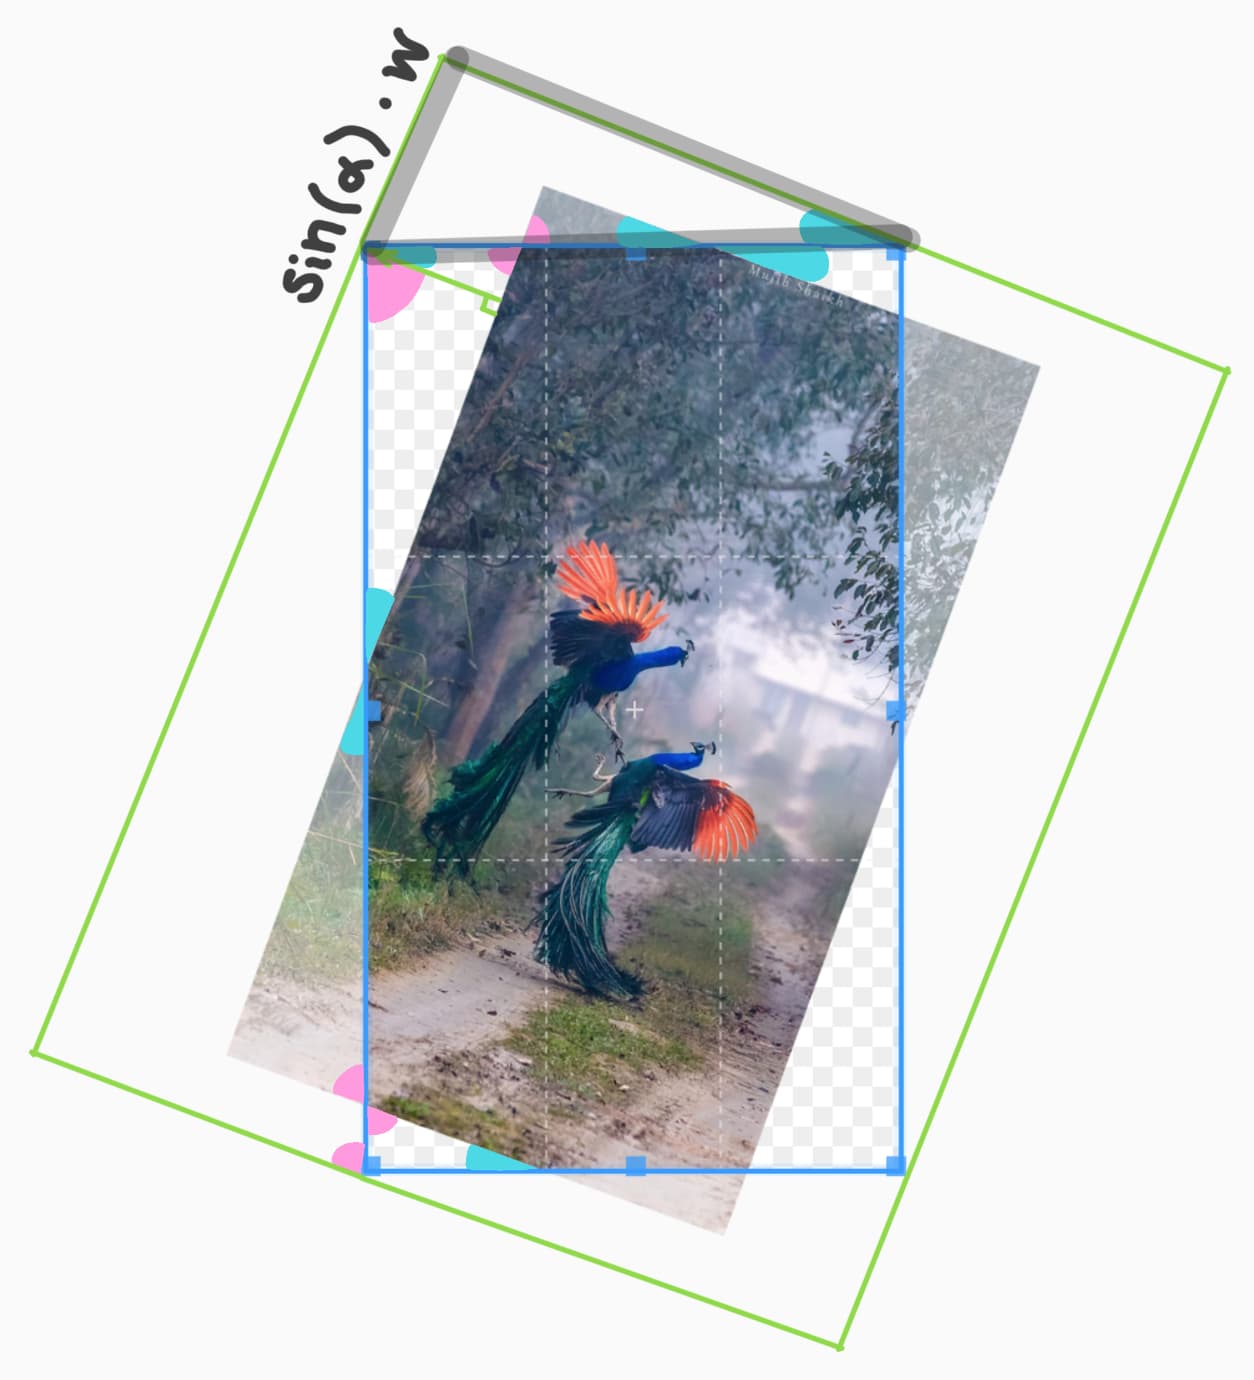
|
So, now we have our desired H! We know one of our scaling factors is H/h.
Now, we just need to find our other scaling factor, which is W/w. This follows
a similar process, and you can find the calculations as part of the full
solution below.
scalingFactor
= max(scalingFactor1, scalingFactor2)
= max(H/h, W/w)
= max(
  (sin(α - 90) * h + sin(α) * w) / h,
  (sin(α) * h + sin(α - 90) * w) / w
)
Conclusion
In Uppy, our code ended up looking like this:
function getScalingFactor(w, h, rotationAngle) {
	const α = Math.abs(toRadians(rotationAngle));

	const scalingFactor = Math.max(
		(Math.sin(α) * w + Math.cos(α) * h) / h,
		(Math.sin(α) * h + Math.cos(α) * w) / w,
	);

	return scalingFactor;
}
const image = cropper.getImageData();
const scaleFactor = getScalingFactor(image.width, image.height, rotationAngle);
cropper.scale(scaleFactor);
You can see the full version on GitHub.
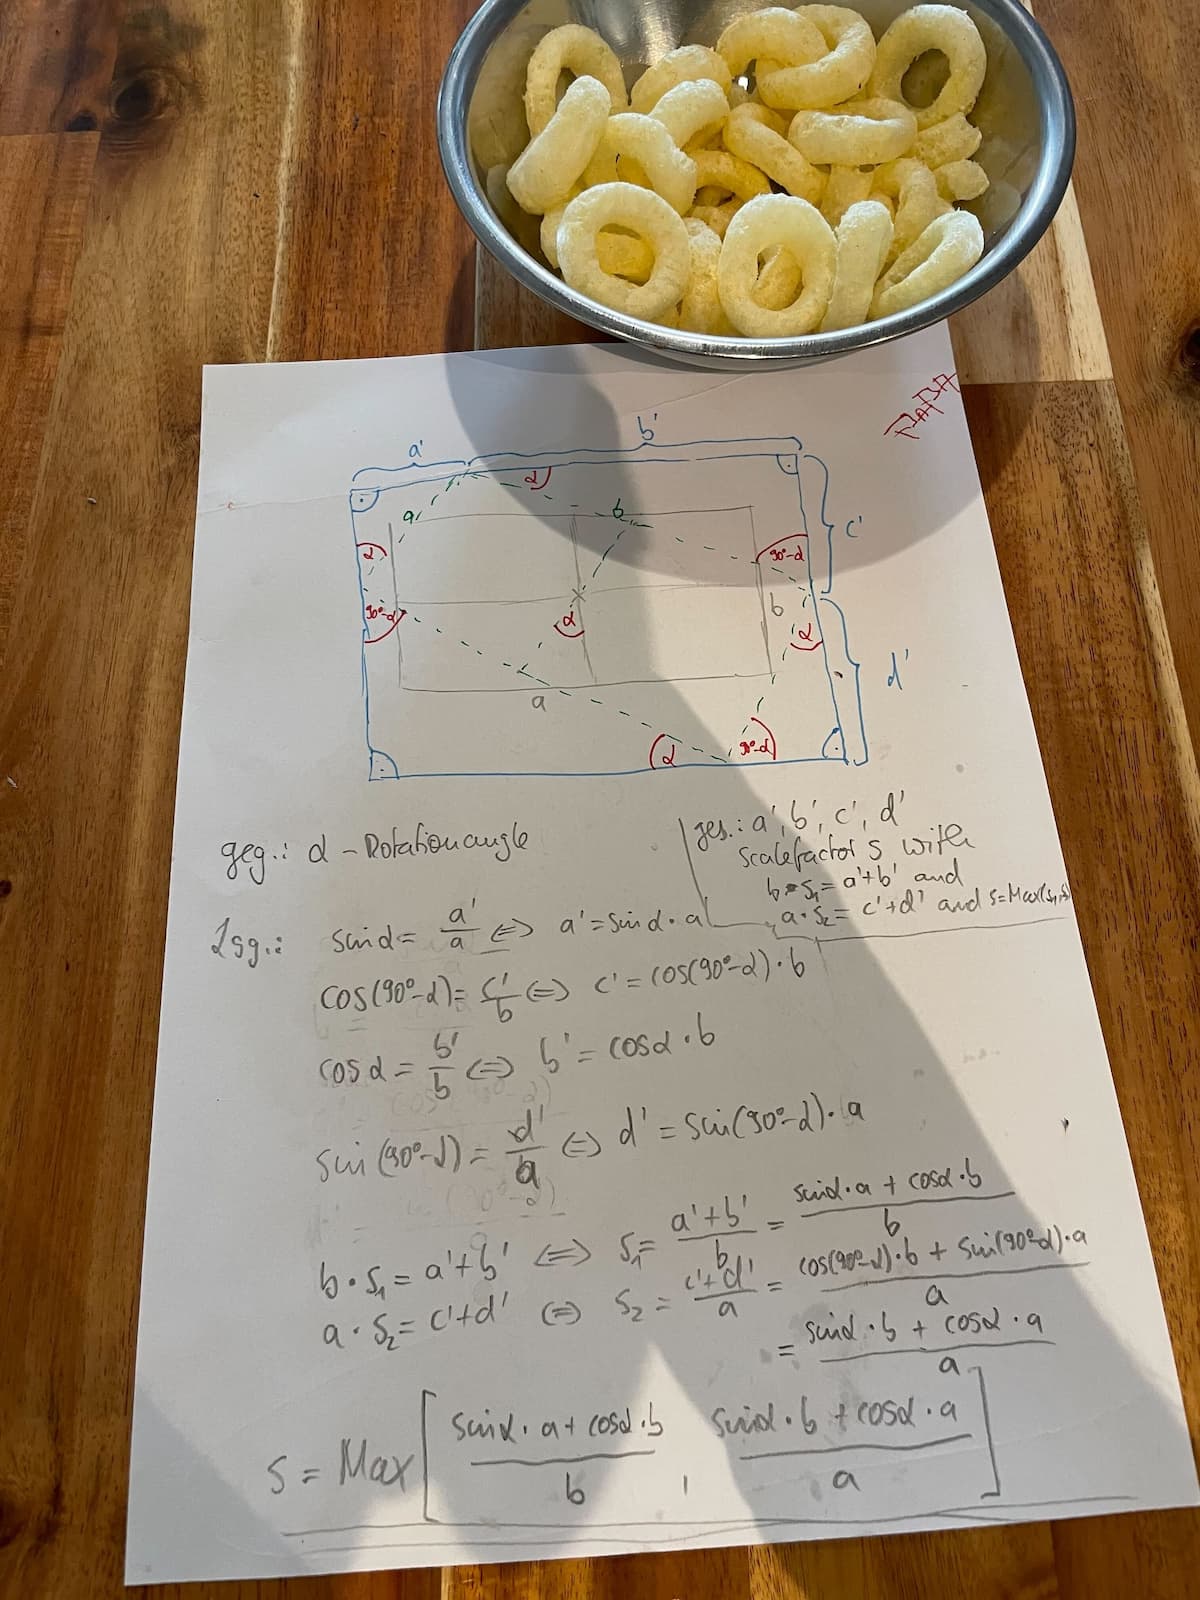
Bonus content: our founder’s (Tim Koschuetzki) initial scribbled notes with the solution